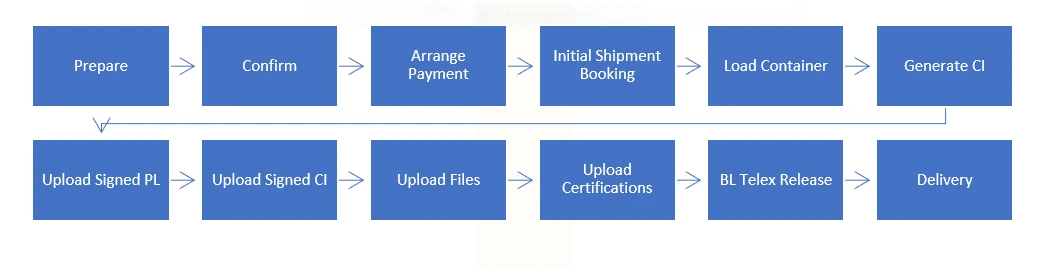
Shipment
Lumytic enhances logistics by tracking and monitoring goods, creating optimized loading plans, and generating professional packing lists and commercial invoices. It boosts customer satisfaction by offering one place to follow up shipment life cycle. it provides secure document storage for efficient file management
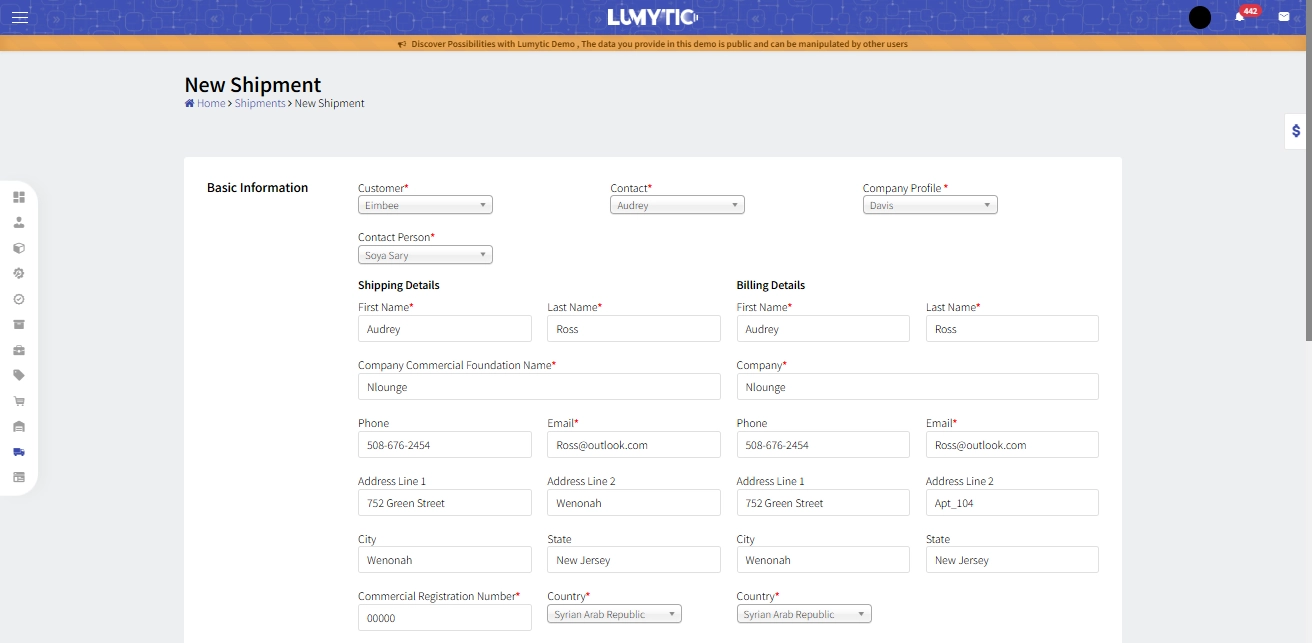
Create Shipment
Use this feature to initiate a new shipment by defining shipment details, assigning products, and generating related documents such as packing lists and invoices. This ensures organized, accurate, and traceable delivery operations.
- From the shipment page, click Add Sea or Air freight.
- Enter the shipment's basic information: Customer, Contact, Company Profile and Contact Person.
- Fill in the Shipping and Billing Information for the selected customer, including first and last name, Commercial foundation name, Email address, Country and commercial registration number.
- Choose the container size: 20 GP, 40 GP, 40 HQ or Air fright
- Click get item button in the container section,
- The system will display all pending items for the selected customer.
- Enter the quantity of each item you want to include in this shipment plan
- Review all entered information, then click save.
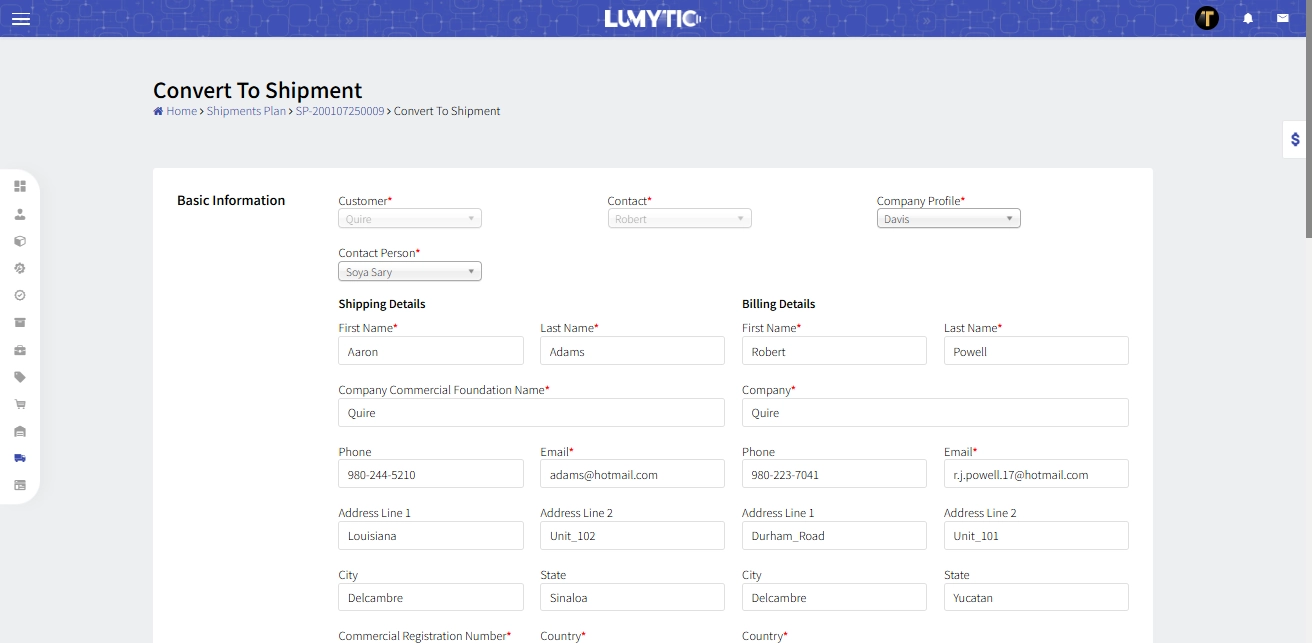
Create Shipment from Plan
Seamlessly convert your loading plan into a shipment, streamlining the transition from planning to execution.
- From the shipment plan details page, click the convert to shipment button
- The system will display all shipment plan details, allowing you to review and update any necessary information before proceeding
- After reviewing, click Save to finalize and create the shipment from the plan.
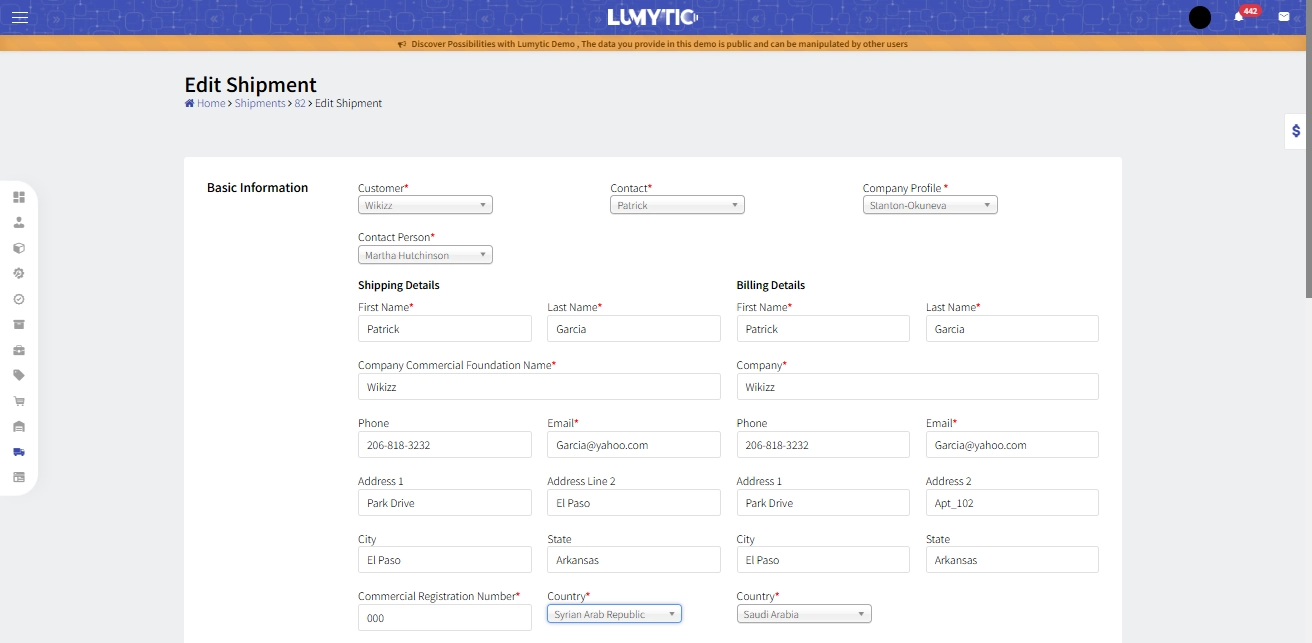
Edit Shipment
Use this feature to update the details of an existing shipment. You can modify product quantities, adjust shipping information, or update related documents to ensure accuracy and reflect any changes in the delivery process.
- From the shipment details page, click Edit.
- Make the necessary updates then click save
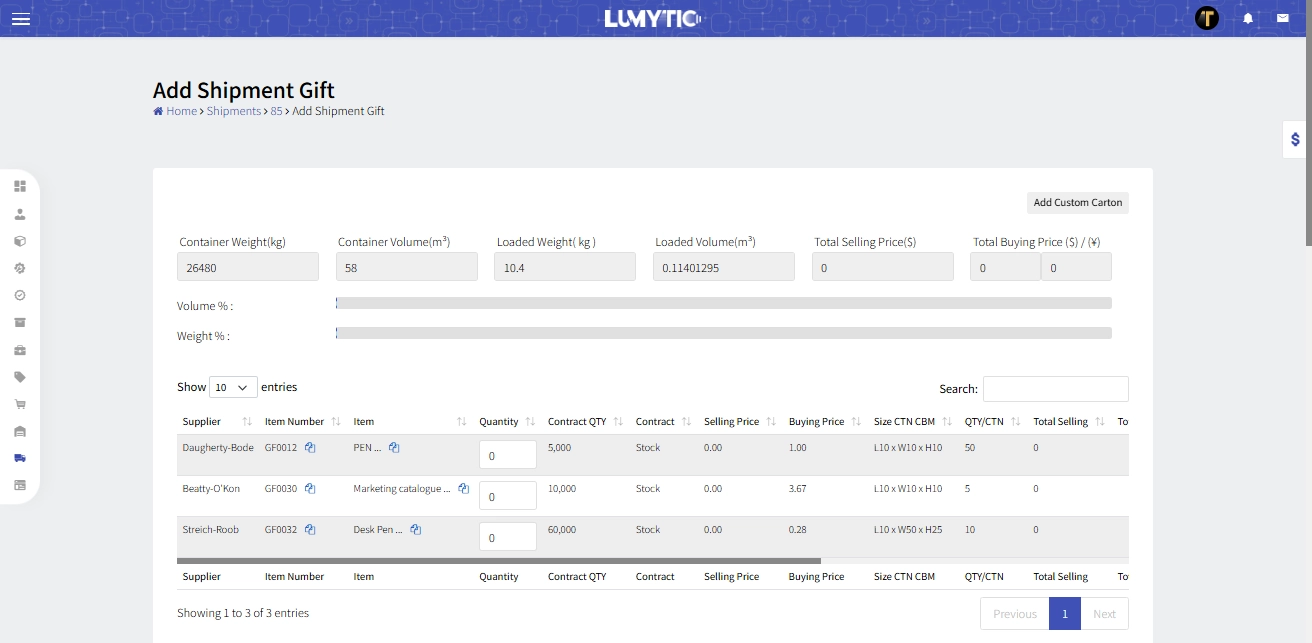
Edit Shipment Gift
Sending marketing gifts within containers is a well-known strategy to enhance customer engagement and brand loyalty. Lumytic supports this feature by allowing you to select the gifts you want to include and customize their packing size within the container for optimal space usage and presentation.
- From the shipment details page, go to shipment containers section then click edit Gift button.
- The system will display all gift items that include packing details, You can also access other gift items without packing info when creating a custom carton
- Click "Add Custom Carton", then enter the required measurements and specify the quantity
- Review all entered information, then click Save.
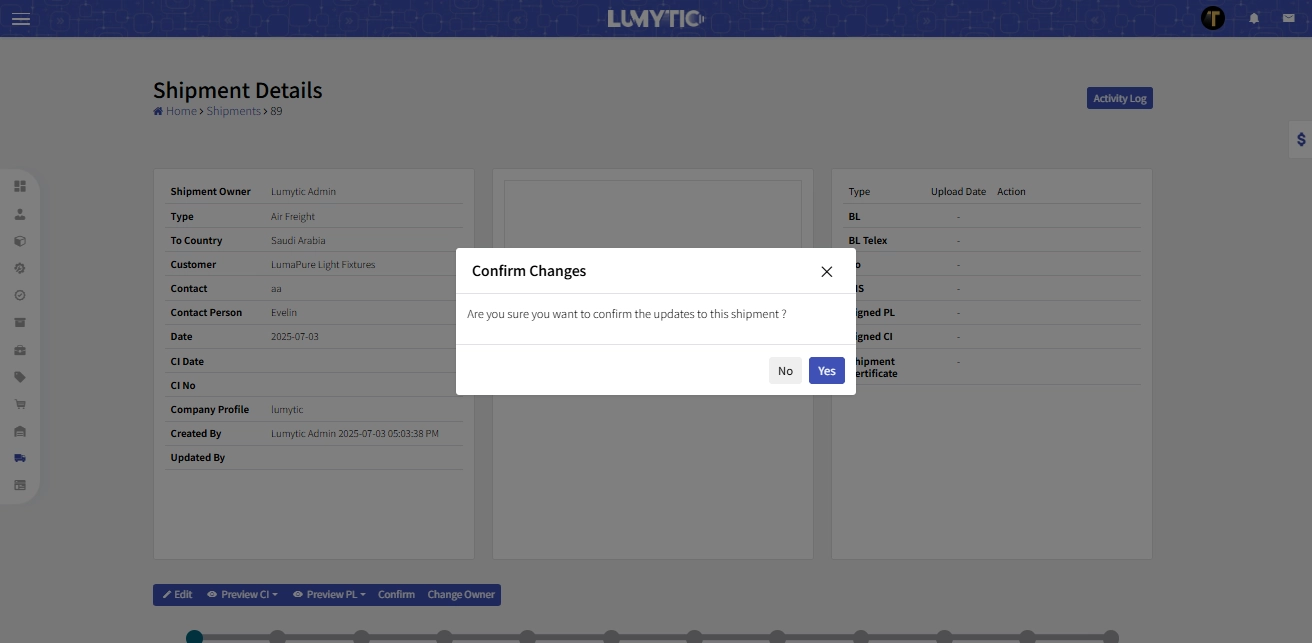
Confirm Shipment
After completing all necessary updates, you must confirm the shipment to make it available in the Customer Portal.
- From the shipment’s details page, click confirm.
- The system will display a confirmation message before proceeding with the action.
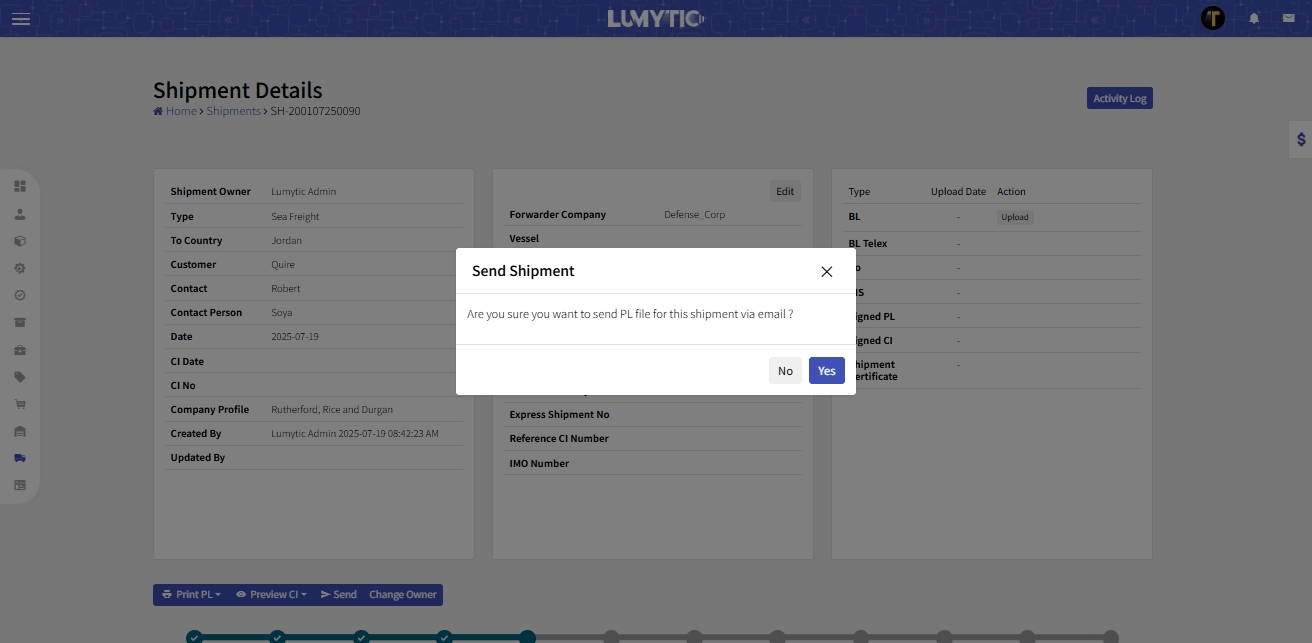
Send Shipment via Email
This feature allows you to send a shipment notification to the customer via email.
- From the shipment’s details page, click send button.
- The system will display a confirmation message before proceeding with the action.
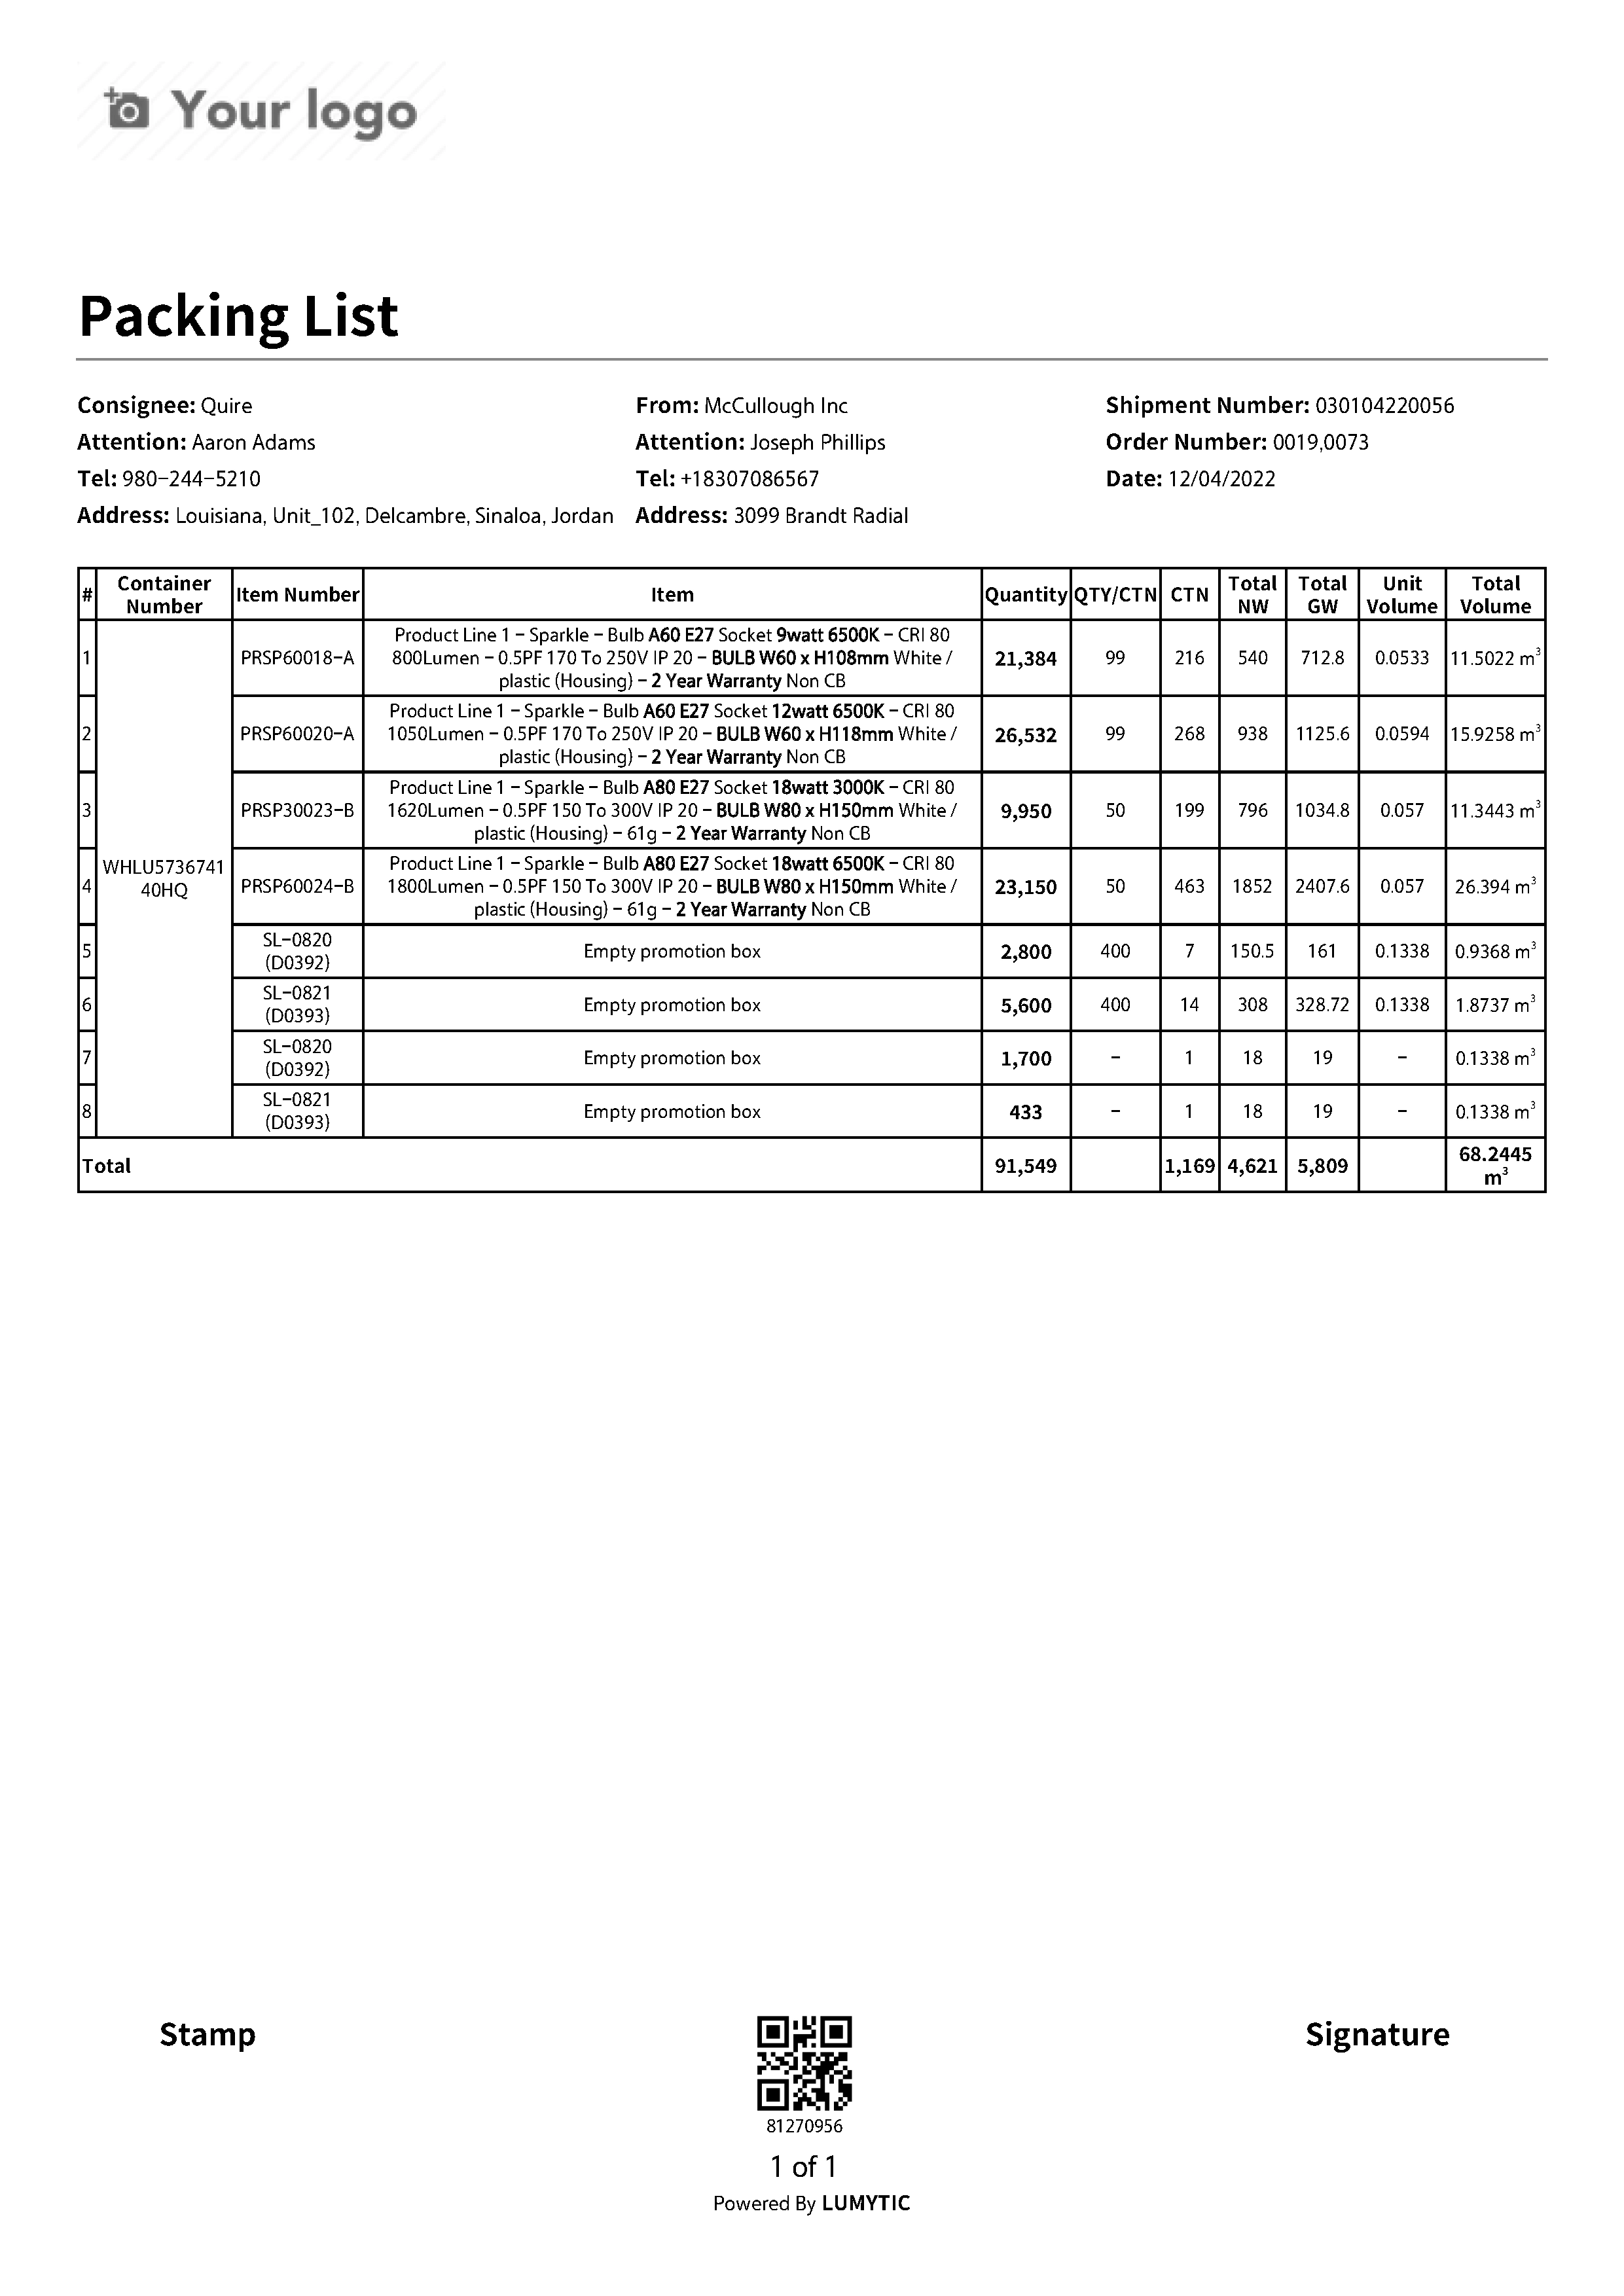
Print Packing List
You can generate and export a professional Packing List directly from the shipment details page.
- From the shipment details page, click the Print PL (Custom or Original) to export professional Packing List documents in one click.
- The system will open the Packing List file in a new window for viewing or downloading.
The system provides two versions of the Packing List:
- Custom Copy: Displays the Packing Product Code instead of the Product Number (for use with customs).
- Original Copy: Displays the Product Number as registered in the system.
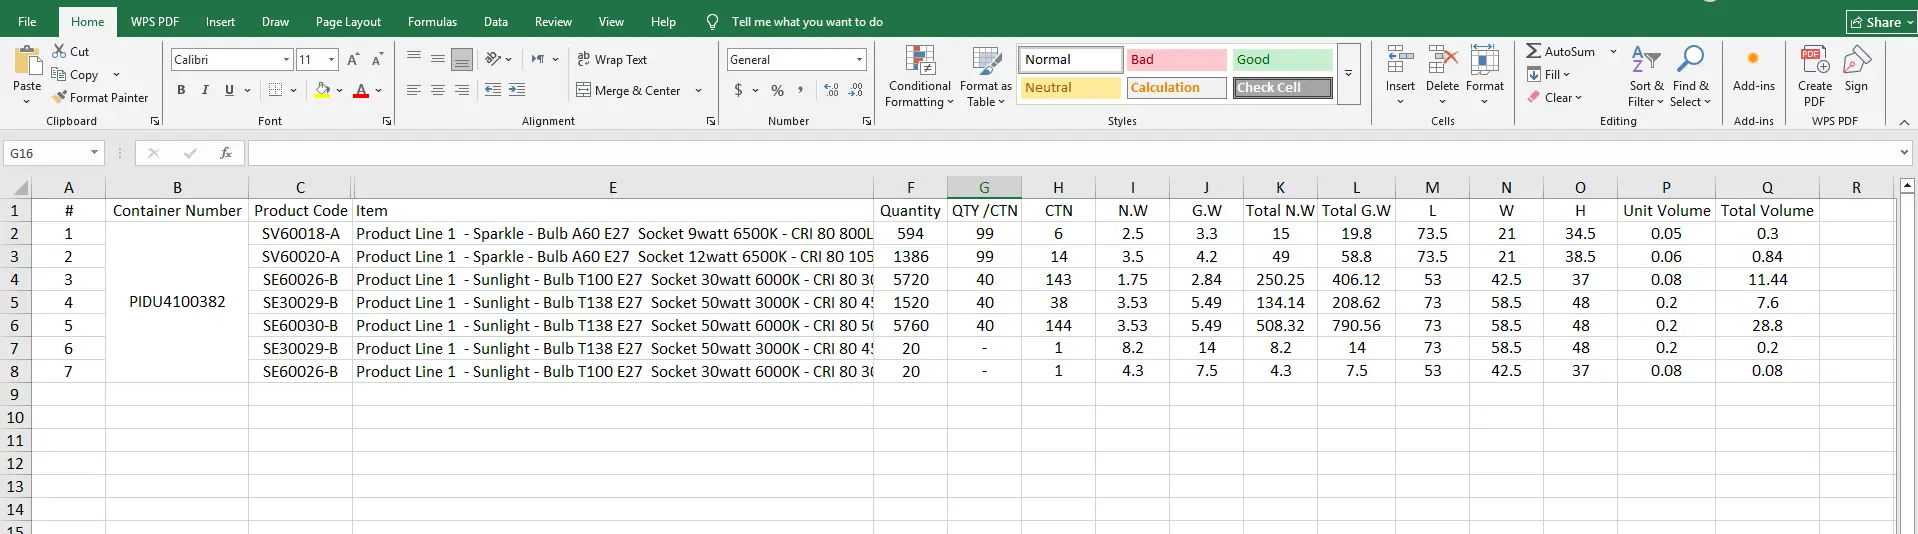
Export Packing List as Excel file
The Packing List is one of the most important documents in the shipping process. Lumytic provides the ability to export it in Excel format with all necessary details and proper formatting.
- From the shipment’s details page, click Export Excel action under Print PL button to export professional Packing List documents in one click.
- The system will automatically download the file to your computer.
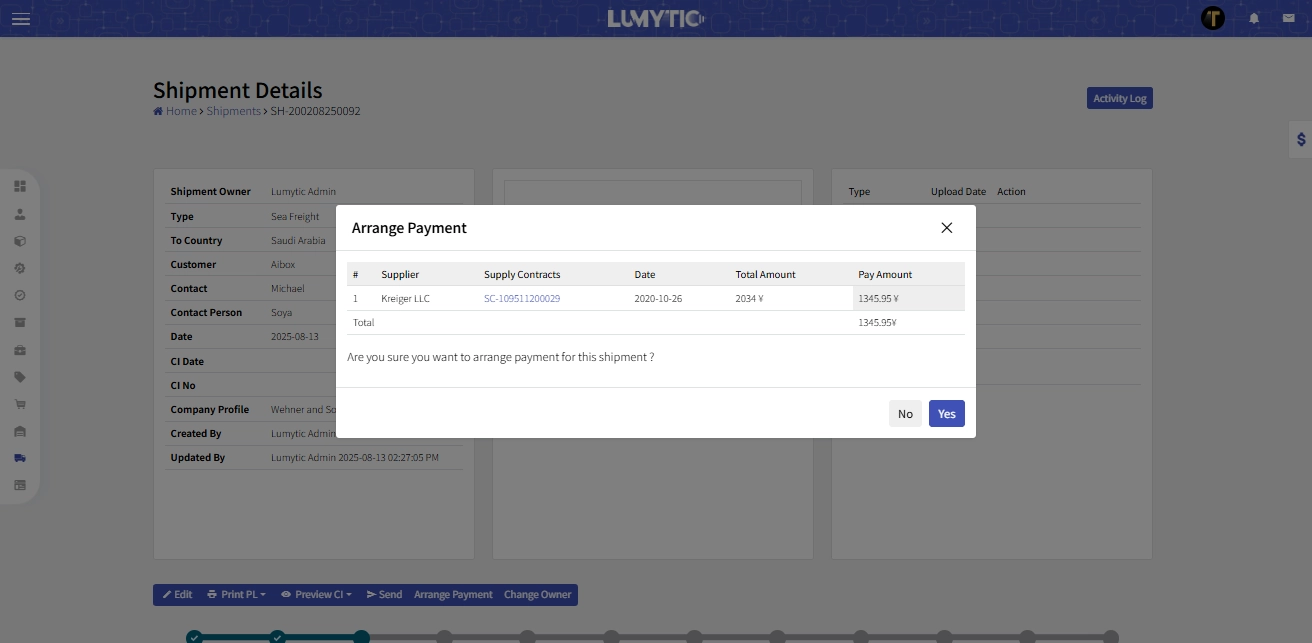
Create COD Payment for Linked Supply Contract
This feature allows you to arrange Cash on Delivery (COD) payments for goods under a supply contract, based on shipment expenses.
- From the shipment details page, go to supply contract section then click arrange payment
- The system will display all expenses related to the shipment and automatically calculate the payment amount to be allocated to each supply contract.
- Carefully review the data, then click "Yes" to confirm and create all listed COD payments.
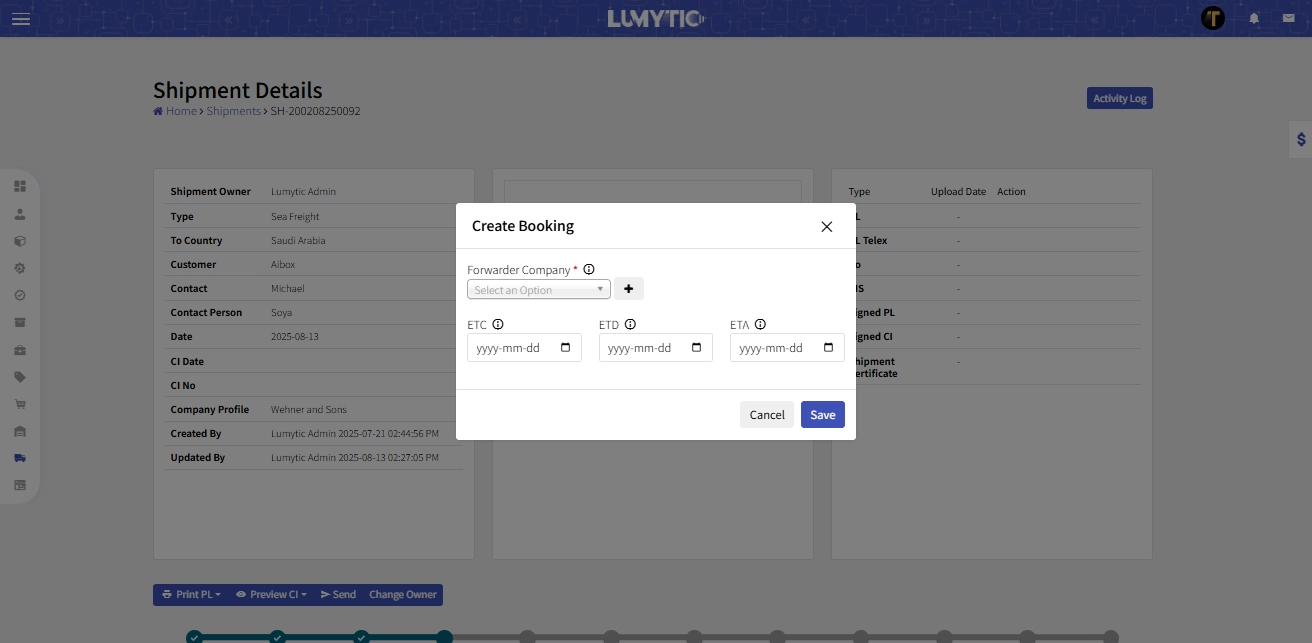
Create Shipment Booking
Create book your shipment with ease, ensuring all details are set for smooth logistics from start to finish. Track your shipment's journey with accurate booking information for seamless delivery.
- From the shipment details page, go to booking section then click add button
- Choose forwarder company
- Fill key dates: ETC (Estimated Time of Completion), ETD (Estimated Time of Departure), and ETA (Estimated Time of Arrival) to ensure timely and efficient delivery
- Review all entered information, then click save.
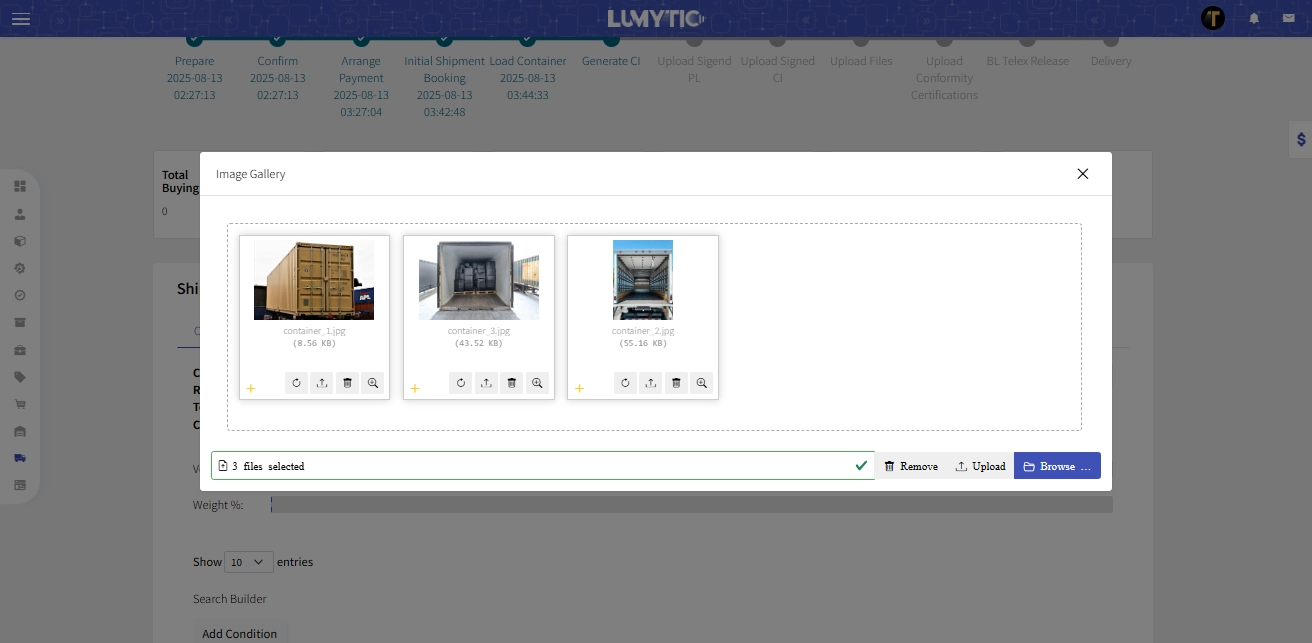
Upload Loading Container Photos
This feature allows you to upload photos of the loaded containers for documentation and verification purposes.
- From the shipment's details page, go to the shipment containers section then click container Image
- Click Browse, select the appropriate container image from your computer
- After selecting the image, click "Upload" to complete the process.
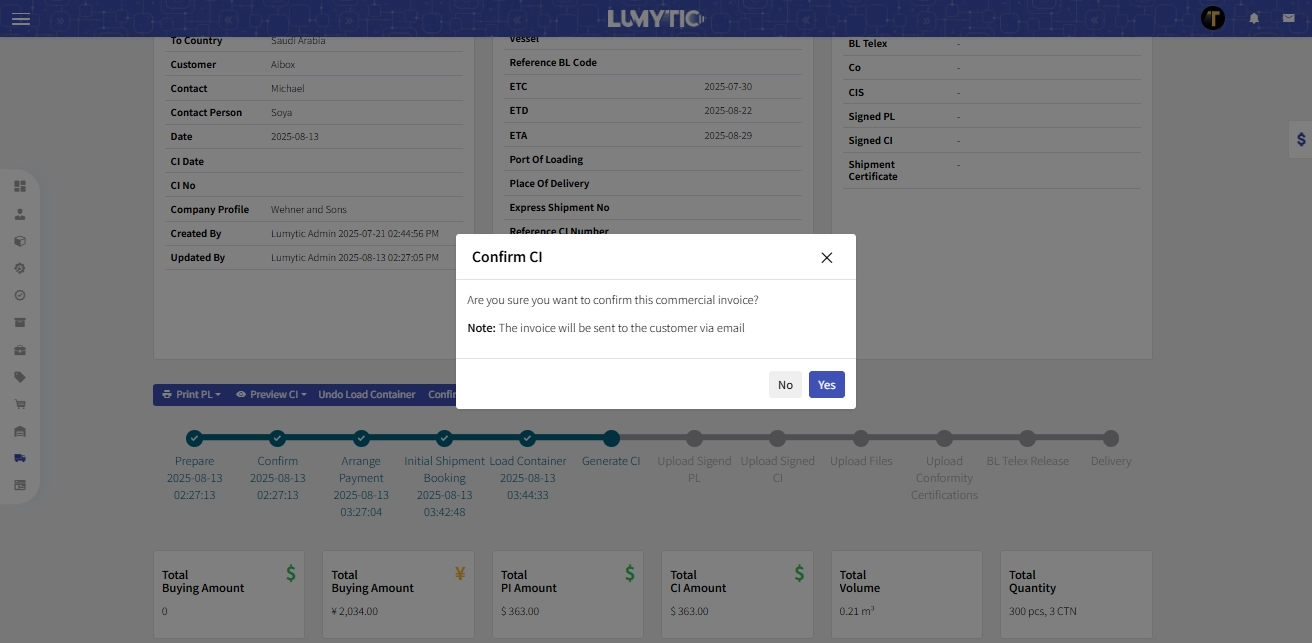
Confirm Commercial Invoice
This feature allows you to update the Commercial Invoice (CI) prices, which may differ from the Proforma Invoice (PI). You can also create a special CI version for customs if needed. Once all updates are finalized, the CI must be confirmed to lock in the pricing.
- From the shipment details page, click Confirm CI,
- The system will display a confirmation message before proceeding with the action save.
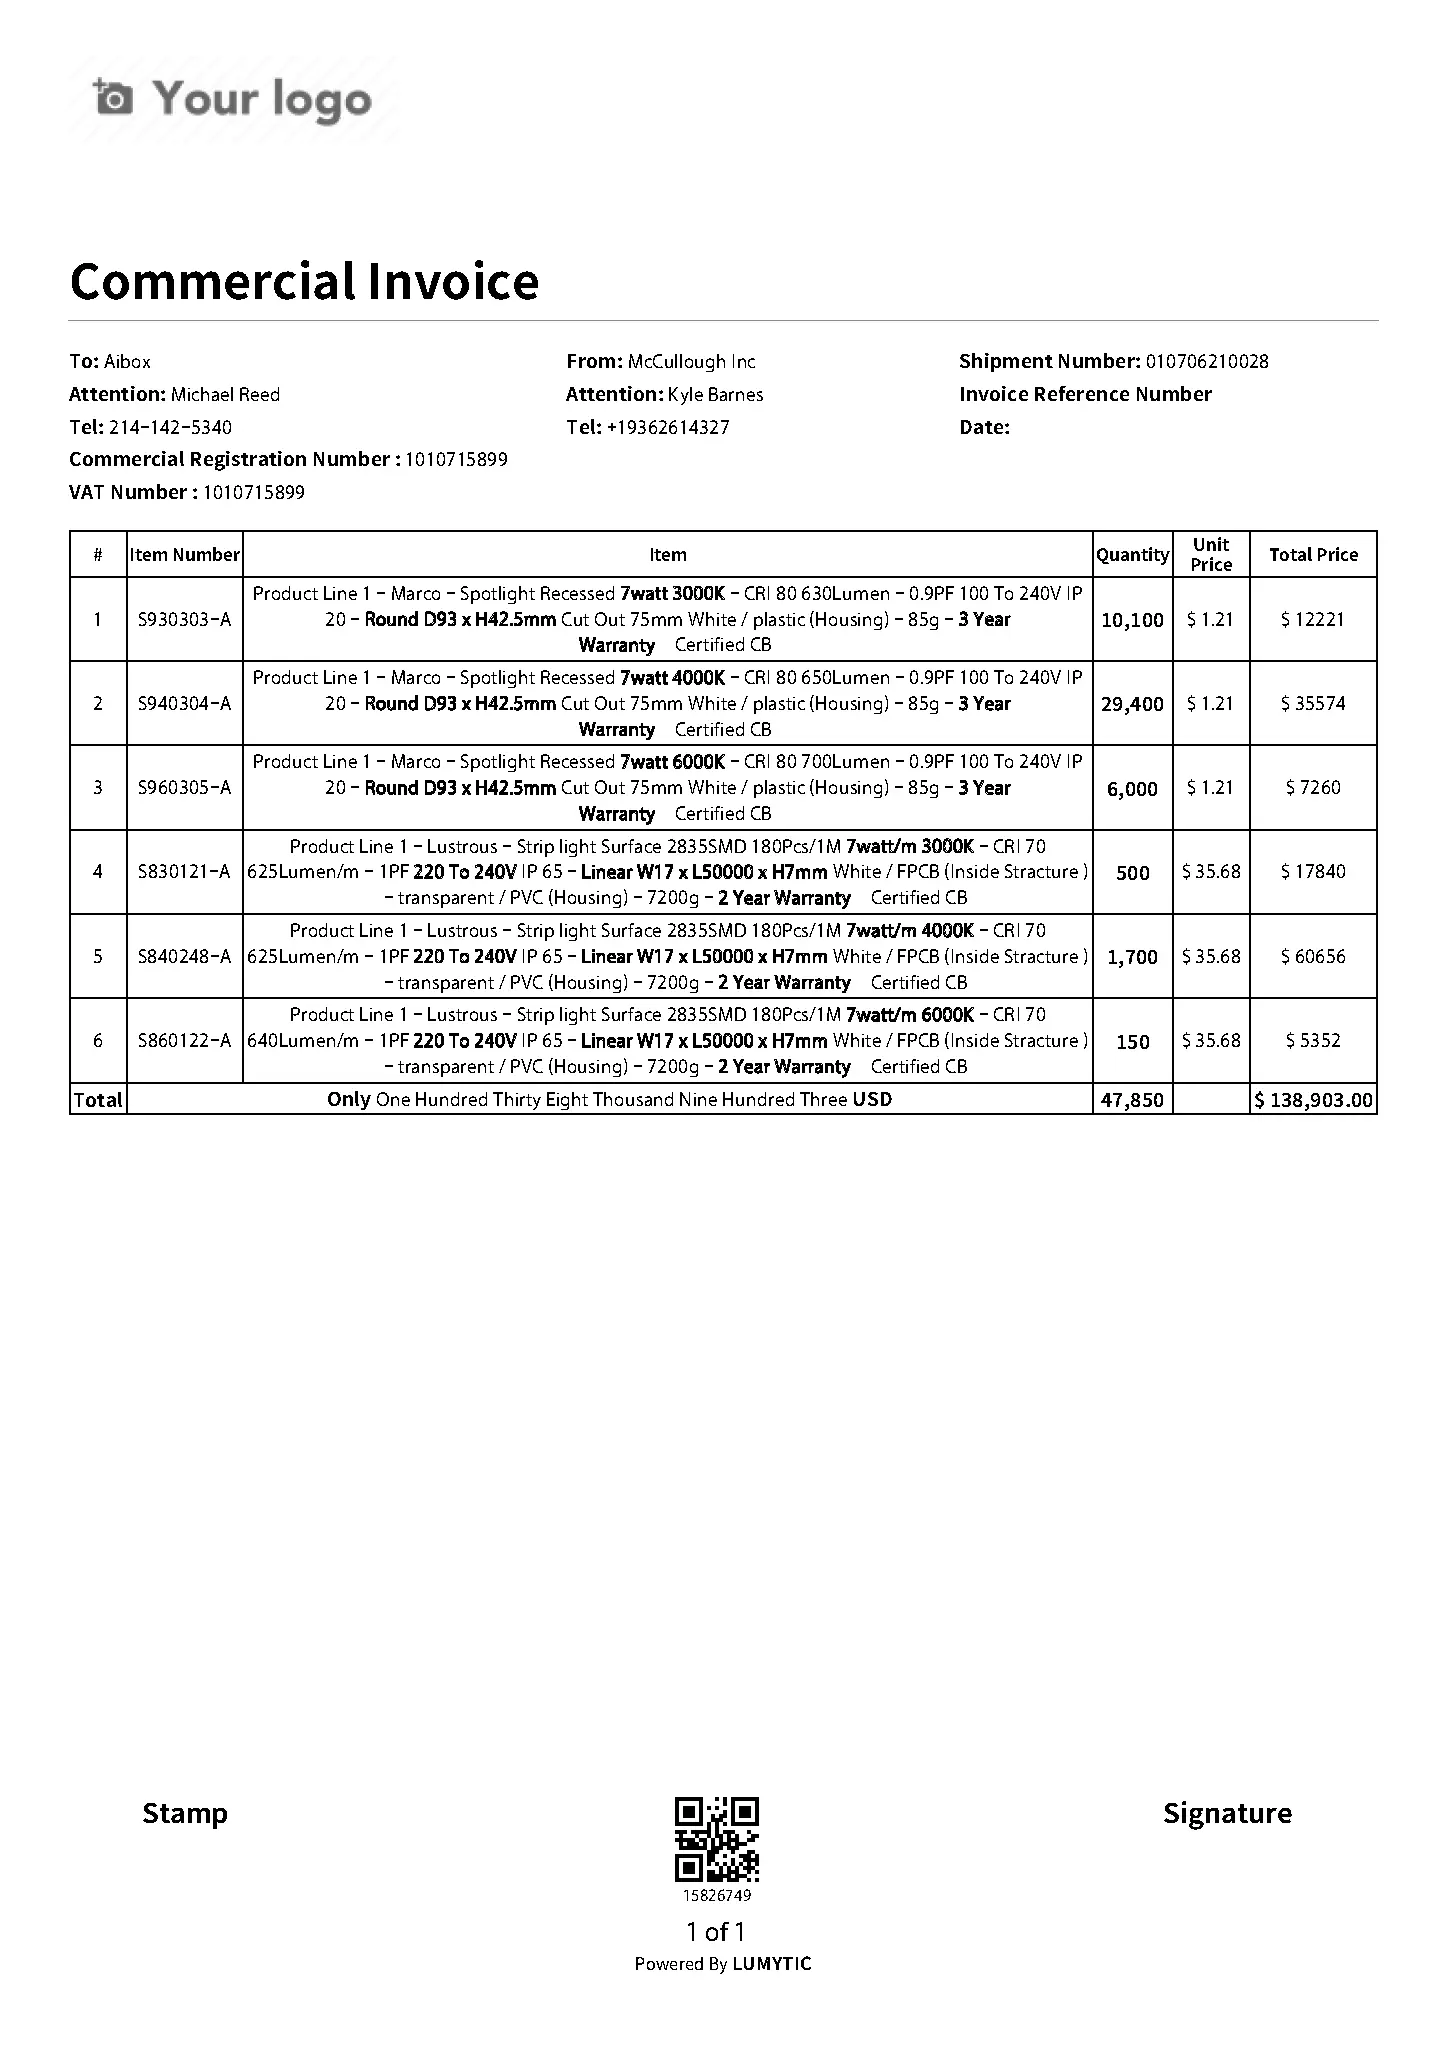
Print Commercial Invoice
You can generate and export a professional Commercial Invoice (CI) directly from the shipment details page for documentation and customs purposes.
- From the shipment details page, click the Print CI (Custom or Original) to export professional Commercial Invoice in one click.
- The system will open the invoice in a new window for viewing or downloading.
The system provides two versions of the Commercial Invoice:
- Custom Copy: Displays the Packing Product Code instead of the Product Number and includes the customs price (used for customs clearance).
- Original Copy: Displays the Product Number as registered in the system and shows the official CI price.
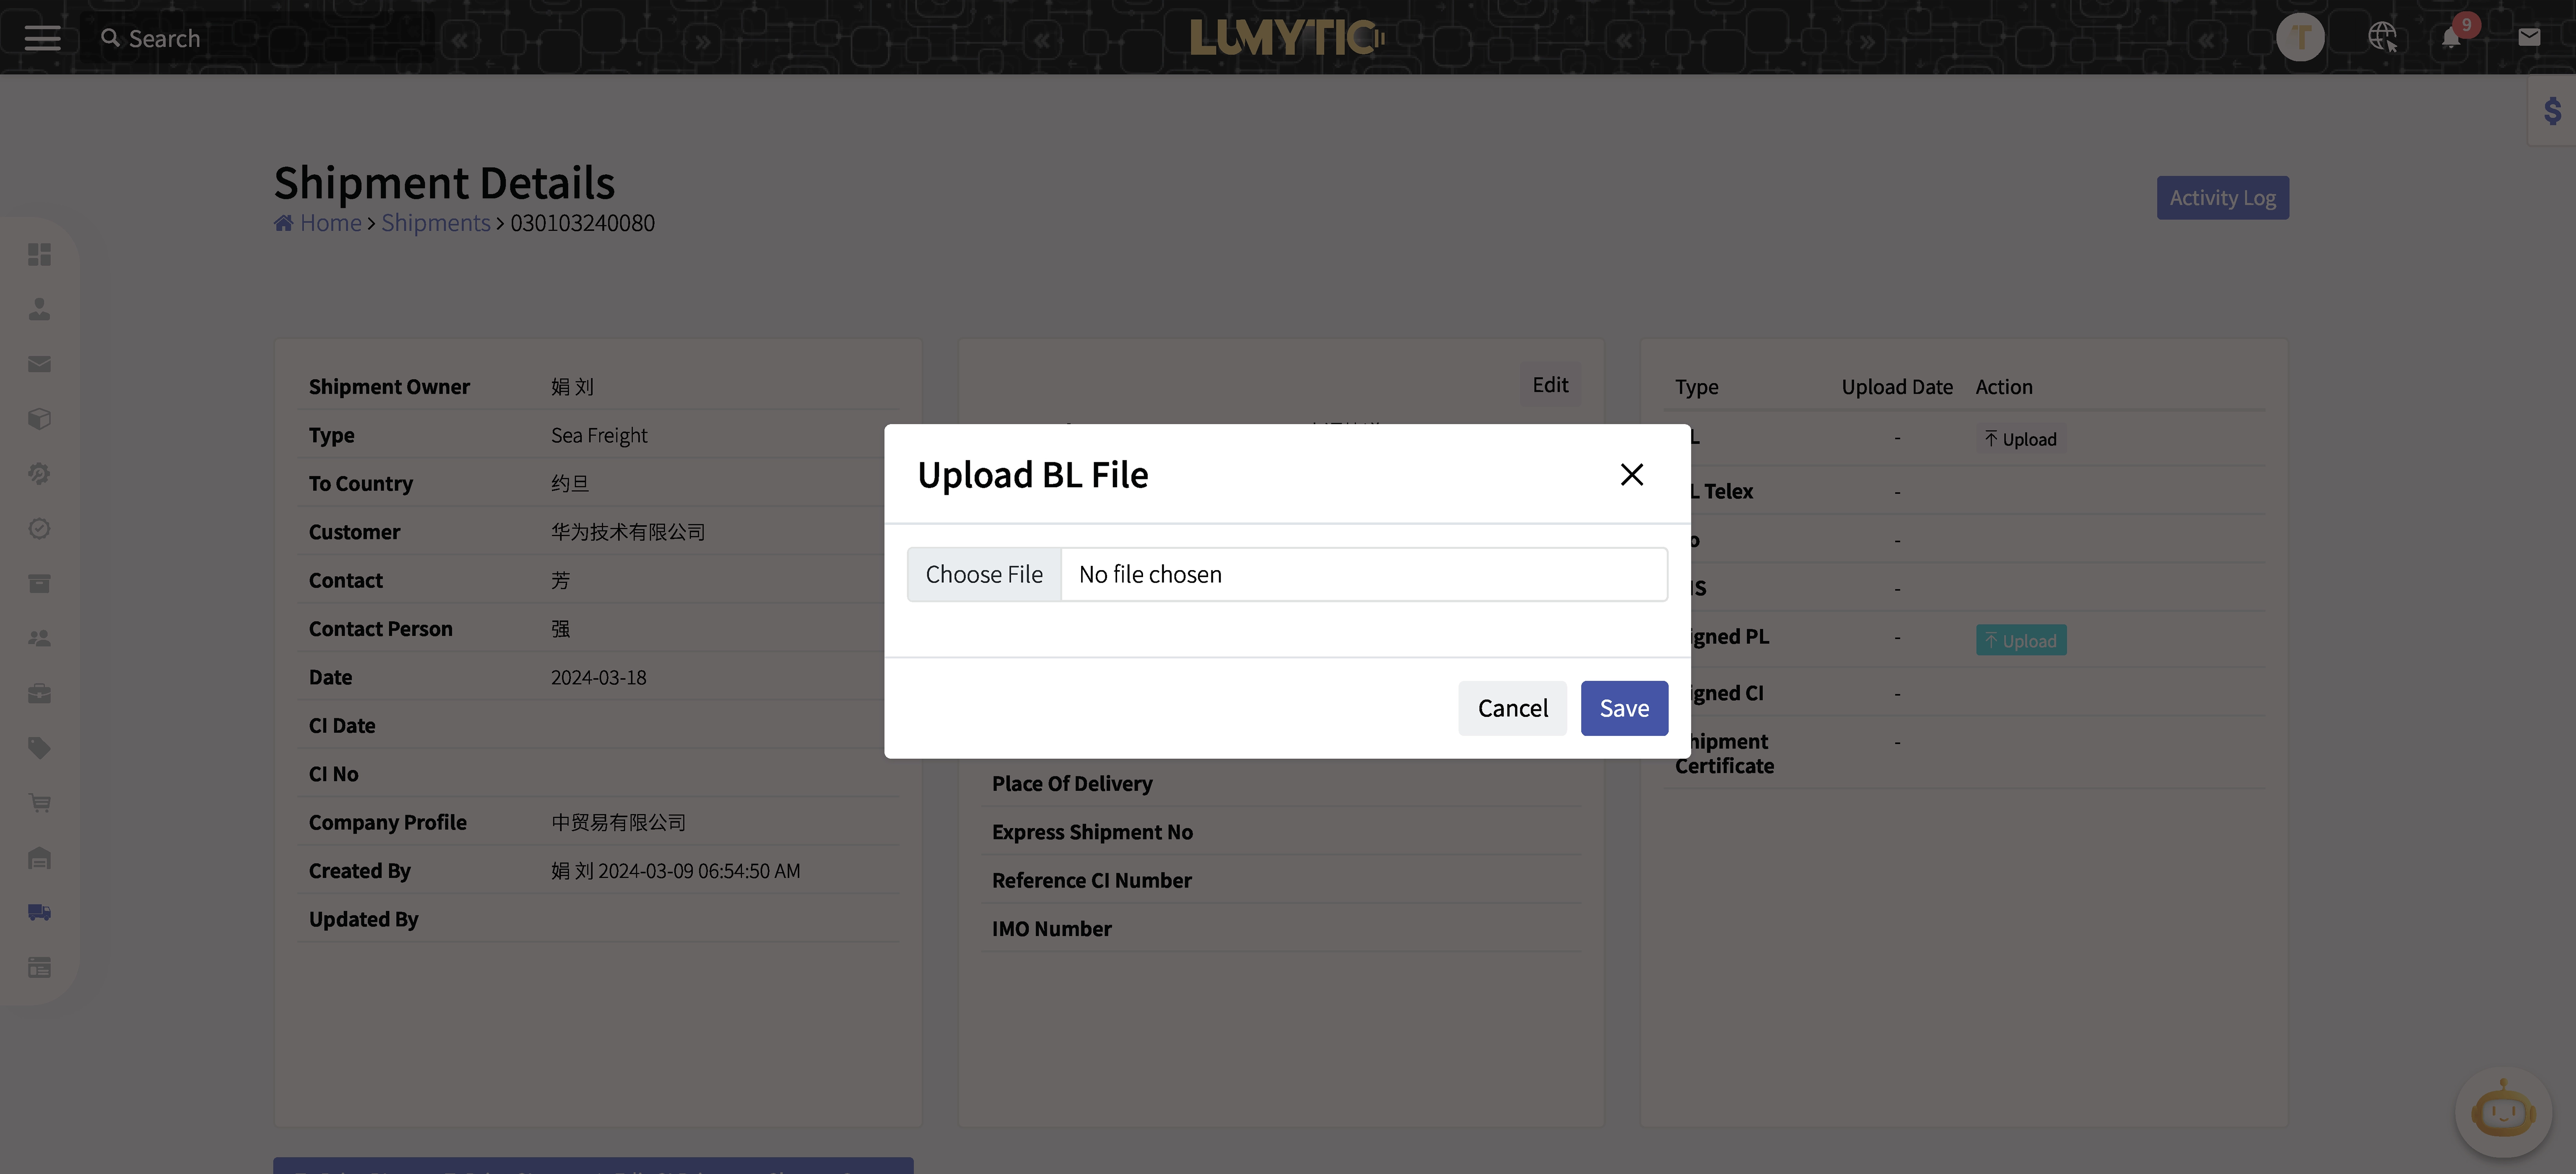
Upload Shipment Customs Files
This feature allows you to upload and attach customs-related documents directly to a shipment for proper documentation and compliance
- From the shipment details page go to files sections then Click Upload next to the File Type row you want to upload.
- Choose the file from your computer.
- Click Save to upload and attach the file to the shipment